All Resources

Portable Worm Farm

In this activity, students create a miniature worm compost to learn further about decomposers.

The average Canadian produces a tonne of household waste each year. About 30% of this waste is organic matter. Vermicomposting, or composting using worms, produces beautiful black castings—organic, nitrogen-rich natural fertilizer that is one of the best soil additives on the planet.

Worm castings can be used to fertilize houseplants and gardens. As they break down food, they also produce a liquid fertilizer that can be diluted and used for watering plants.

When operating effectively, worm farms are odourless because the worms eat decomposing matter and any noxious odours leaving a fresh, earthy smell.

Over time, a worm farm can become a complex mini ecosystem, with all types of decomposers doing their part.

Typical worm farm organisms are the same as the typical decomposers: fungi, bacteria, and invertebrates. Some of these organisms come from the food waste itself, like the fungi, and bacteria. The common invertebrates are sow bugs (woodlice), red wrigglers, and small white worms. Flies may even help in the breakdown of the food waste, but their presence can become a nuisance and can be prevented simply by burying food waste.

A worm farm begins with a few very simple parts, and slowly grows in complexity. It starts with some worms, bedding, dirt, moisture, and food. The latter four parts are designed to give worms all they need to live a happy life.

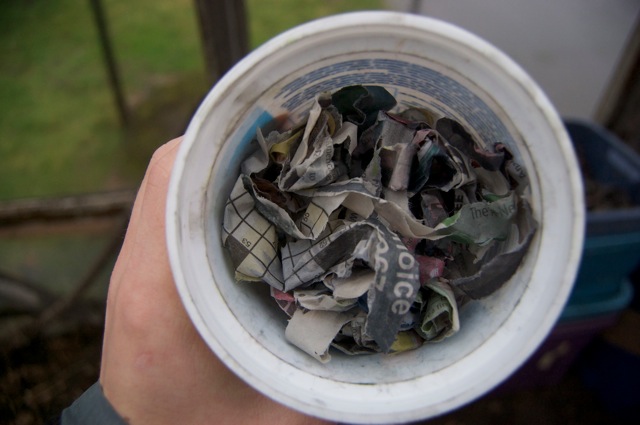
  • The bedding is where they live, and although it can be made up of a lot of different materials, it typically is something that can keep a lot of gaps for air circulation, and should consist of material that is high in carbon. For example, shredded newspaper does a great job as long as it is not clumped together.
  • Worms do not have teeth, and so their digestion is aided by small gritty pieces of sand and silt found in dirt. They don’t need much, but their proper digestion depends on some.
  • A proper level of moisture is important because a worm’s body is naturally slimy. If it is too dry, their body will lose its needed natural moisture levels. If too wet, worms will drown.
  • Lastly, and most importantly, worms need food. As decomposers, they eat dead material, and although they have preferences, given enough time, they’d eat most things. To make the easiest functioning worm bin, however, it is best to stick to fresh food waste and coffee grounds.  Do not feed them cooked food, meat, bones, or citrus peels. As the worm population increases, more food will have to be added.

As the worms live in their environment they will eat their food, and poop out black pieces called castings. They will even turn the bedding into castings given enough time. In higher amounts, the castings resemble fresh soil, or compost.

Once there is a collection of black castings, they can be harvested as fertilizer, and the worm farm can be renewed with a new set of bedding, and the entire process will begin again.

In this activity, the worm farms students will make are small and may not sustain worms forever. Remind students that worms are living things and as a class, they should take care of them and research further about their needs. As a class, school or home project, have students build a bigger worm farm out of a larger Rubbermaid container.
Objectives

  • Create a worm compost farm.

Materials

  • Per class:
    1 cup of dirt
    1 large Ziploc full of uncooked food waste
    1 big pail or bowl
    1 jug for water

  • Per student:
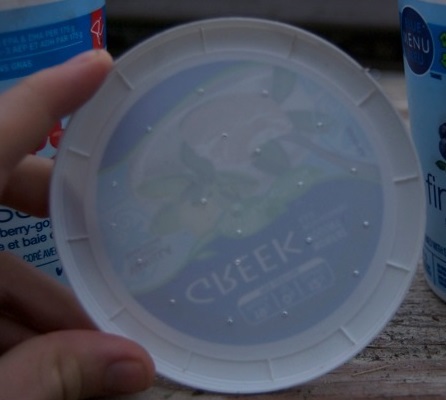
    1 yogurt container with lid (Encourage students to bring a clean container from home.)
    ~1/2 cup water
    ~2 sheets of newspaper
    1 pushpin
    4-5 red wriggler worms (aka night crawlers) from bait store or or worm supplier

    Teacher Tip: Because worms reproduce really well and if taken care of properly their populations are self-sustaining, it is a good idea to ask a friend or neighbor who has worms if they can spare some. That way you can start your own worm compost from their population!

Key Questions

  • What do worms need to stay living a happy life?
  • How can you give them these things?
  • What colour changes do you observe as the compost breaks down?
  • How does the smell of the compost change as it breaks down?

What To Do

Set up

  1. Place the pail, the container of worms, and the bag of food waste on a table like an assembly line.
  2. Hand out 2 pieces of newspaper to each student
  3. Hand out a yogurt container with lid and a pushpin to each student.

Teacher Tip: This activity requires a lot of space. Ensure that the assembly stations are spread out so that students have enough space to work within.

Part 1: Preparing the bedding

  1. Have students leave their  yogurt containers and pushpin at their personal table.
  2. At the assembly table, have students help shred the newspaper into long, narrow strips, 1-2 cm wide and then place all shredded pieces into the pail at the assembly table.
  3. Have students estimate how much water is needed, and then measure that much out.
  4. Pour the water in stages into the pail. Mix the newspaper around to distribute the water evenly. You want to continue adding water until the newspaper is the same moistness as a wrung out sponge.
  5. Add the cup of dirt. Mix well to distribute. Keep the newspaper fluffy, not clumpy.
  6. Have students return to their own tables.

Part 2: Preparing the home

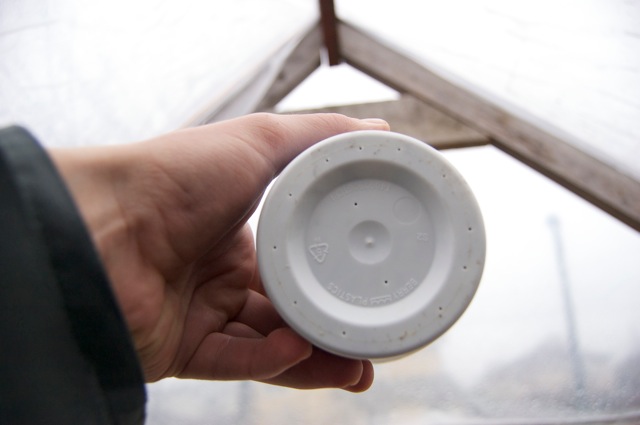
  1. Using a pushpin, have students carefully poke around 20 holes all over the top of the lid.
  2. Then have them poke around 15 holes all over the bottom of the yogurt container.
  3. Next, have students walk up to the assembly table and take a handful of wetted newspaper and place it lightly into the yogurt container. Fill it up to ¾-7/8 full. Do not pack it in tight at all, because the worms will need room to breathe.
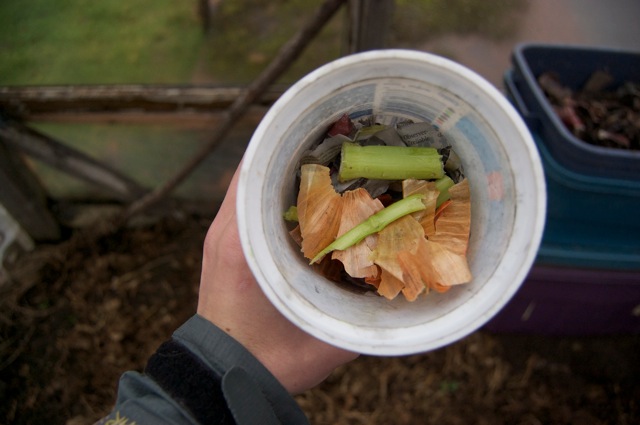
  4. Then, have the students lift up the very top pieces of newspaper in the  container and put in a few pieces of food waste and then replace the top pieces of newspaper.
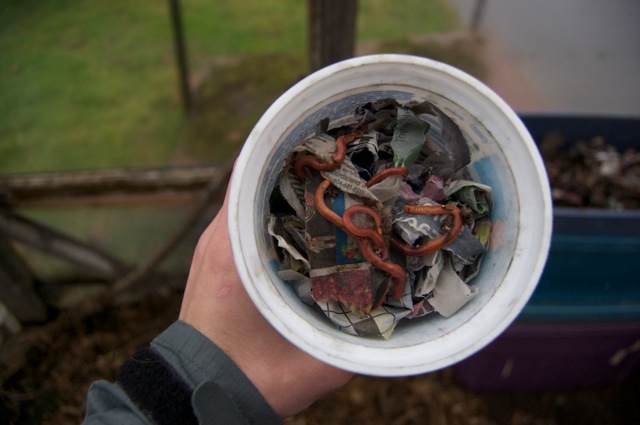
  5. Next, place 4-5 red wriggler worms on the top of the newspaper of each student’s container. Let the students know that the worms will immediately start tunnelling to avoid the light.
  6. Have students place the lid onto the yogurt container.
  7. At home, students should place the worm farm on a ledge with a plate or tray underneath it. In mild climates, their worm farm can live outside.
  8. Let students know that every few days they should check on their  worms, and feed them a few more small pieces of uncooked food waste if they have eaten the rest.
  9. Over time liquid will drip from the bottom. Let students know that they can dilute this liquid with 10 parts water, and water your plants as a liquid natural, organic fertilizer.
  10. Over time the inside will turn into a black solid mixture that looks like soil. This can be added to any plant area to give it a great nutrient boost!

Extensions

  • Set up a school compost bin/worm factory.

Other Resources

MetoVancouver | Worm Composting Brochure

​University of Illinois | Investigate the adventures of Herman the Worm

TED -Ed | Vermiculture: How worms can reduce our waste

Crash Course Kids | Video | The Dirt on Decomposers

The Complete Compost Gardening Guide by Barbara Pleasant and Deborah L. Martin
Worms Eat My Garbage by Mary Appelhof

About the sticker

Survivors

Artist: Jeff Kulak

Jeff is a senior graphic designer at Science World. His illustration work has been published in the Walrus, The National Post, Reader’s Digest and Chickadee Magazine. He loves to make music, ride bikes, and spend time in the forest.

About the sticker

Egg BB

Artist: Jeff Kulak

Jeff is a senior graphic designer at Science World. His illustration work has been published in the Walrus, The National Post, Reader’s Digest and Chickadee Magazine. He loves to make music, ride bikes, and spend time in the forest.

About the sticker

Comet Crisp

Artist: Jeff Kulak

Jeff is a senior graphic designer at Science World. His illustration work has been published in the Walrus, The National Post, Reader’s Digest and Chickadee Magazine. He loves to make music, ride bikes, and spend time in the forest.

About the sticker

T-Rex and Baby

Artist: Michelle Yong

Michelle is a designer with a focus on creating joyful digital experiences! She enjoys exploring the potential forms that an idea can express itself in and helping then take shape.

About the sticker

Buddy the T-Rex

Artist: Michelle Yong

Michelle is a designer with a focus on creating joyful digital experiences! She enjoys exploring the potential forms that an idea can express itself in and helping then take shape.

About the sticker

Geodessy

Artist: Michelle Yong

Michelle is a designer with a focus on creating joyful digital experiences! She enjoys exploring the potential forms that an idea can express itself in and helping then take shape.

About the sticker

Science Buddies

Artist: Ty Dale

From Canada, Ty was born in Vancouver, British Columbia in 1993. From his chaotic workspace he draws in several different illustrative styles with thick outlines, bold colours and quirky-child like drawings. Ty distils the world around him into its basic geometry, prompting us to look at the mundane in a different way.

About the sticker

Western Dinosaur

Artist: Ty Dale

From Canada, Ty was born in Vancouver, British Columbia in 1993. From his chaotic workspace he draws in several different illustrative styles with thick outlines, bold colours and quirky-child like drawings. Ty distils the world around him into its basic geometry, prompting us to look at the mundane in a different way.

About the sticker

Time-Travel T-Rex

Artist: Ty Dale

From Canada, Ty was born in Vancouver, British Columbia in 1993. From his chaotic workspace he draws in several different illustrative styles with thick outlines, bold colours and quirky-child like drawings. Ty distils the world around him into its basic geometry, prompting us to look at the mundane in a different way.